
This post may contain affiliate or sponsored links. Please read our Privacy Policy and Disclaimer.
With cities creeping into the country and horse properties becoming smaller and smaller, the issue of “what do I do with my horse manure?” is real.
A 1,000-pound horse produces 37 pounds of manure each day, or nine tons per year. This creates a large manure pile in a short amount of time, and many small acreage horse properties do not have the space to store it long-term. Pima County, Arizona, where I live, gives specific horse manure instructions on its website. I can either compost my manure or I can rent a bin from my garbage company and have it hauled off weekly. Compost is a valuable resource, so I opted to build a bin. This is an easy, low-cost project that you can do yourself. 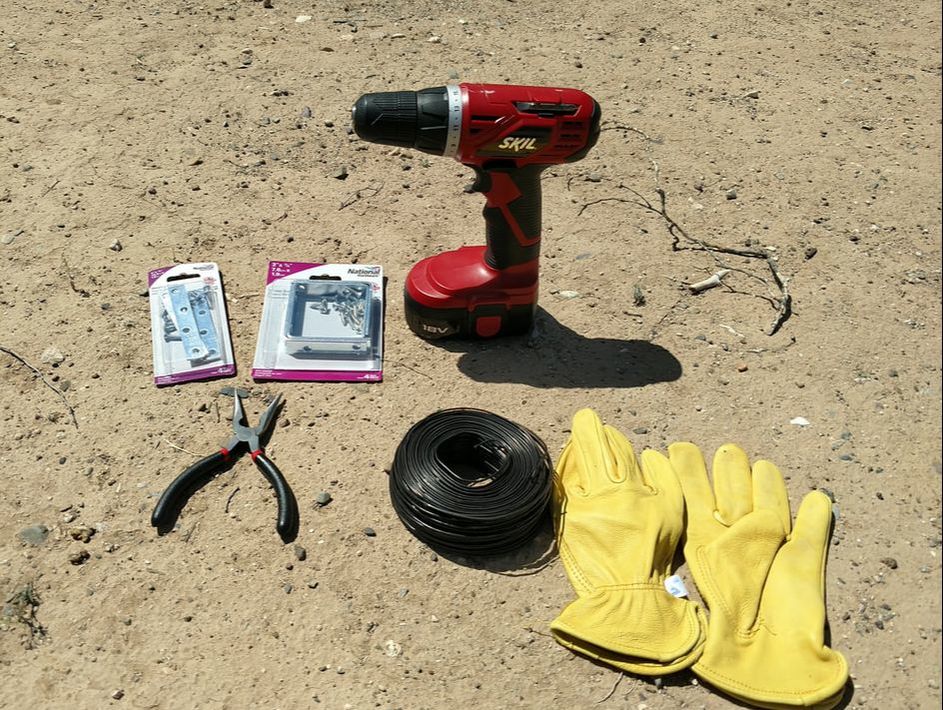
Materials
Construction
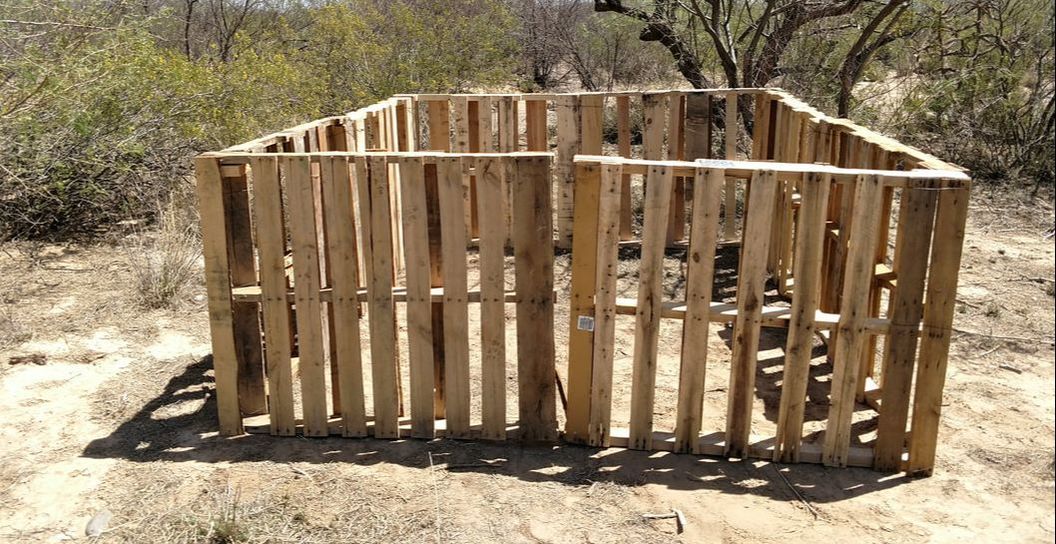
Your bin will be square, with two pallets on each side. Start by connecting two pallets together with the mending braces. I laid my pallets side-by-side on the ground and screwed one mending brace 1/3 of the way from the top, and the second 1/3 of the way from the bottom. Tie baling wire or twine at the middle for extra support. Repeat two more times until you have three pairs of pallets connected. 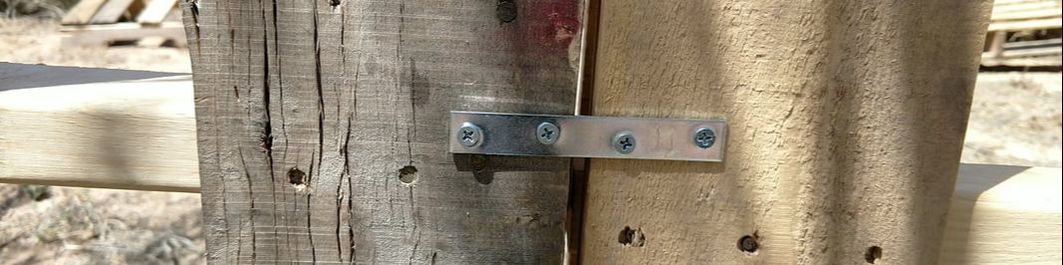
Next, stand your pairs of pallets up and form three sides of your square. Make sure the corners are snugged together. My pallets balanced well, but if you have a helper, they can hold the pallets in place for you. At each back corner, tie the center together with baling wire or twine. Then, screw one corner brace 1/3 of the way from the top, and the second 1/3 of the way from the bottom. Because of my pallet’s construction and the size of my drill, I was only able to get three screws in my corner brace, but it holds fine.
The last two pallets are the doors for the front of your bin. My design has two doors that open at the center. I used baling wire to create hinges for my door (one 1/3 of the way from the top and one 1/3 of the way from the bottom) but you can also use hardware hinges here. The hardware hinges will make your doors open and close much smoother 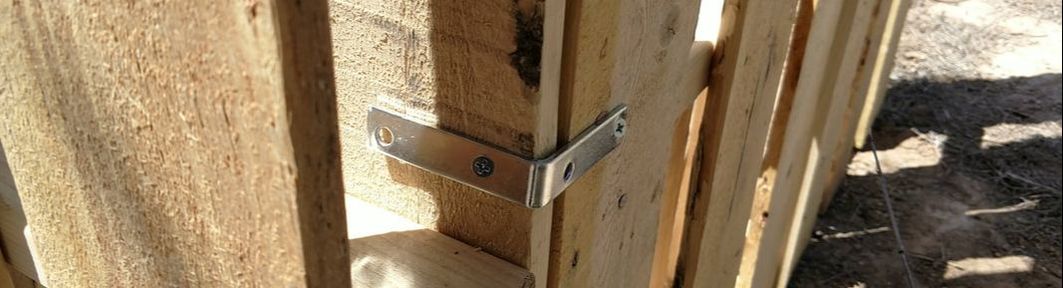
Cover the top of your bin with your tarp and secure. I use baling twine, but you could purchase tarp straps and use those as well. I bought a cheap blue tarp because I live in Arizona where the wind rarely blows, but if you live in a high-wind area, spend the money and get a quality tarp. When I lived in windy Eastern Montana, I learned that canvas tarps outlast any plastic tarp and are well worth the money. They are the only tarps that will hold up to sustained winds over 30 miles per hour. They cost more up front, but you will save money not constantly replacing your plastic tarps. I used this one in Montana and it lasted five years before I had to replace it, so I highly recommend it.
My bin measures 8 feet by 8 feet 6 inches. Your dimensions may vary a bit, depending on the size of your pallets. I have plenty of room to back my Can-Am Defender into it to dump my manure. When my bin is full I can build onto it by adding three more sides. Good for the Earth Composting is a great option for small-acreage manure management. Not only do you save money but you create a sustainable resource that adds life to depleted soil. Use your compost yourself, give it away to friends, or sell it by the pound to fund your horse habit (hint: save feed bags and use them when someone wants to purchase your compost). This easy do-it-yourself project will keep you in good graces with your non-horse neighbors and pay off over and over with improved pastures for your horses.
3 Comments
5/28/2019 06:57:35 pm
Thanks so much for that information. Now I know where to begin! 6/18/2019 09:19:19 pm
I love how you were creative in making this compost bin of yours. As someone who is very fond of horses, I just love the entire thing that you made. If you ask me, I would love to have the same thing back at home. It is amazing that there are people who can think of stuff like this, it truly amazes me. I hope that you can do more things with what you have, and please do share it with us.
Thomas C.
7/17/2021 09:26:53 am
What is the ideal balance between horse manure and dry leaves ? Leave a Reply. |

AuthorWelcome! I've been a freelance writer since 2002 and have numerous horse-related articles published in print and online publications. I have a Bachelor of Science degree from Rocky Mountain College with a major in Equestrian Studies and a minor in Business Management. My current business ventures include High Plains Arena and real estate investing. Archives
March 2019
Categories
All
|
 RSS Feed
Proudly powered by Weebly